I work in the hospitality industry where it is common to still find serial receipt printers. In this post I will cover how you can perform as basic test print from the windows command prompt, without the need for any other software!
Background on serial connections
To be able to transfer data successfully over a seral connection, the seral device i.e. a printer and the computer need to be configured with matching settings for the below properties.
Baud rate – The speed of transmission, this value must match else you will either get no output or rubbish will print. Common values are 9600, 19200, 38400, 57600 and 115200 bit/s
Data Bits: The number of bits used for transferring a character. Common values for ASCII data are 7 or 8. Eight being the most common these days.
Parity: Error checking
Finding and changing a printer’s serial settings
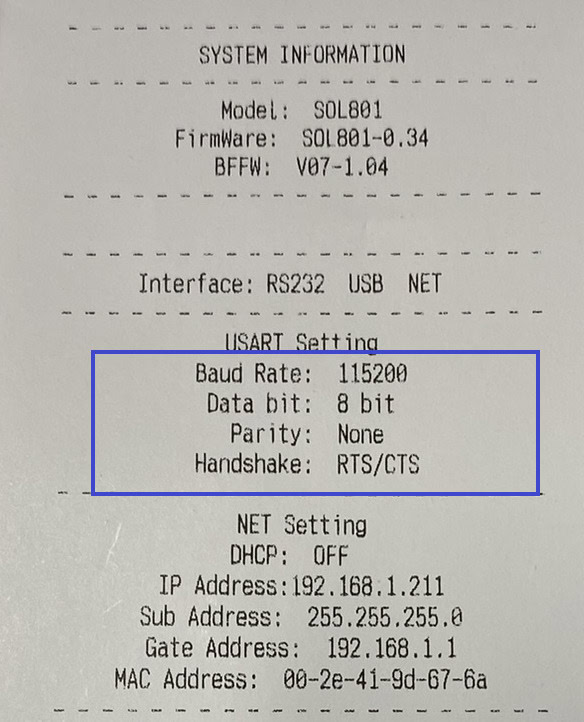
Most serial printer will support printing a system information page (as below), normally by holding down a button while powering on the printer. Or most will have a basic web page that you can connect to check and change the settings. If unsure refer to the manual or vendors website.
Printing to a serial printer from the command prompt
Prerequisites
- Make sure you know the serial connection settings the printer is expecting (as above)
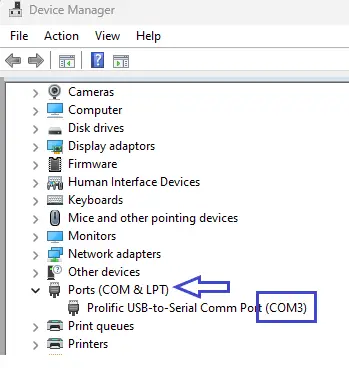
- Identify which COM port the printer is connected to on the Windows computer. It may be physically labelled or look in Device Manager.
Steps
- On the Windows computer, open a command prompt
- Issue the command mode|more to view the current windows settings for the com port (more information on the mode command mode | Microsoft Learn)
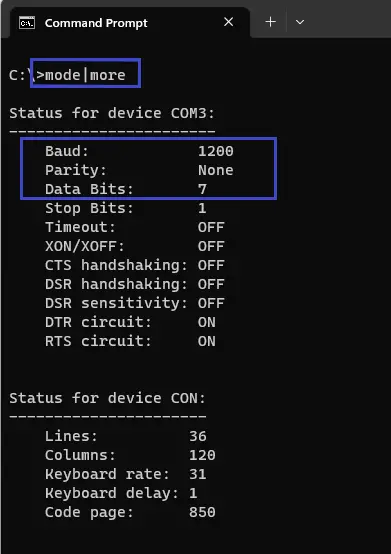
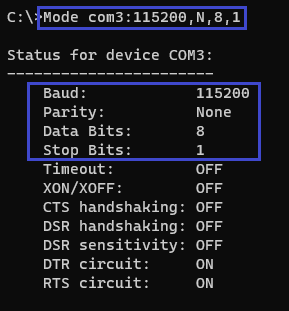
- As in this case the windows setting does not match those of my printer, issue the command Mode com3:115200,N,8,1
- With this command I am modifying the port com3 and setting the baud rate to 115200, parity to None (N), data bits to 8 and stop bits to 1. This matches what my printer is expecting.
- As my command prompt session and my printer now have matching settings for the COM port. I can perform a print with the command echo This is a test>com3
- There will be no output in the command prompt but all being well the printer should print the line “This is a test” to com port 3 (change the com port as required)

Troubleshooting
If you print fails, the following may help
- Check you are using the correct com port. Try configuring and printing to all other come port returned by mode|more.
- Double check your serial settings match for baud rate, data bits and parity.
- If the vendor of the printer and windows hardware i.e. an EPOS till provided a serial cable, try using the cables provided. Particularly if the cable has an RJ11 or RJ12 connector, till hardware manufactures don’t follow a standard for the serial pin outs!
- Reach out to the manufactures.