Background on Host Headers
IIS supports multiple web sites on a single server via three different methods, assigning each site a unique IP address, assigning each site a different TCP port number or the preferred way is using the host header name.
When a users connects to a web server the name of the host they are trying to get to is included in the packet, IIS (and other web servers) can use this field to direct the user to a certain web site hosted on the server.
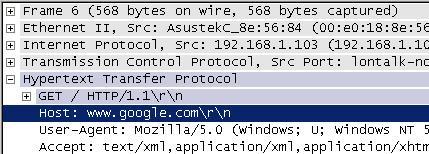
If this is a publically facing web server on the Internet then the host header name will need to be a publicly available DNS name.
If this web server is being used on a private network you will need to register the host header name as a CNAME on your internal DNS server
How to
For this example I have a IIS 7.5 (Windows 2008 R2) server on a private network called WebSrv01 and I want this server to host two websites which users on the network will be able to access via the URLs http:\\site1 and http:\\site2
This how to assumes you have already built your web server and given it a fixed IP, installed IIS and you have a Microsoft DNS server in your environment.
DNS
WebSrv01 already has a A record on my DNS server but I need to create a CNAME record for each of the sites the server will host.
Open the DNS admin tool either on your DNS server or local is you have RSAT or the admin pack installed
Open => Start => Control Panel => Administrative Tools => DNS
Expand DNS Server => Forward Lookup Zones => Your Domain
Right-click your domain and select New Alias (CNAME)
Alias name: site1
Fully qualified domain name for the target host: websrv01.yourdomain.co.uk
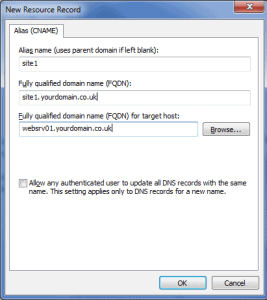
Click OK, repeat for Site2
IIS
On the Web Server open the IIS admin tool
Open => Start => Control Panel => Administrative Tools => Internet Information Services (IIS) Manager
Expand the Web Server => Sites
If you have not already created your websites create them now
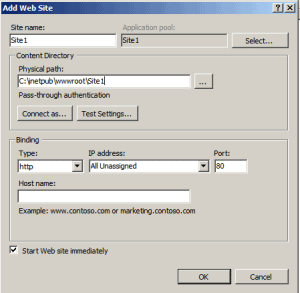
Right-click Sites => Add Web Site
Site name: Site1
Physical Path: Browse you your web root directory normally C:\inetpub\wwwroot\ and make a new folder Site1
Ignore the binding option at the bottom we will get to that next
Repeat for Site2
Now the binding
Right-click Site1 and select Edit Bindings
They should be a default binding such as the below;
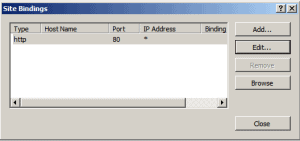
Edit this binding
Change the IP address to the fixed IP of the server
Host name: Site 1
OK
While still in the Site bindings window we are going to add another binding so click Add
Again change the IP address to the fixed IP of the server this time set Host name: to the fully qualified name of your site for example site1.yourdomain.co.uk
Click OK
You are done, give it a test