Following the Minecraft Live 2021 event, I recently started to explore Blockbench with one of my sons. I have been playing Minecraft off and on since it was in Beta and I have created my fair share of games and apps over the years. My son (aged 12) is a big Minecraft fan and after watching the Minecraft Live event this year, he had a desire to give creating his own models ago and get into the world of creating Minecraft mods.
In this post, I will detail how we got everything set up, created a basic model and how we got the model imported into a Minecraft world.
Table of Contents
- What is Blockbench?
- Installing Blockbench
- Installing the Minecraft Entity Wizard plugin
- Creating your first Mob
- Getting your mob into Mimecraft
What is Blockbench?
Blockbench is a completely free open-source tool that can be used to create low-poly, pixel-art 3D models and it can be used to animate them. Blockbench can be used to create models for a variety of games including Minecraft.
Installing Blockbench
You don’t even need to install Blockbench they have a fully featured web app at https://web.blockbench.net/ however if you would prefer to have the installed application head to https://www.blockbench.net/downloads and download and install the version for your operating systems. Windows, Linux and macOS are supported.
Installing the Minecraft Entity Wizard plugin
While you don’t have to use this plugin the easiest way to get started creating custom mobs is to use the Minecraft Entity Wizard plugin. However, it does require the Bedrock edition of Minecraft rather than the Java edition. You can get a copy of Bedrock from the Windows store.
- Open Blockbench
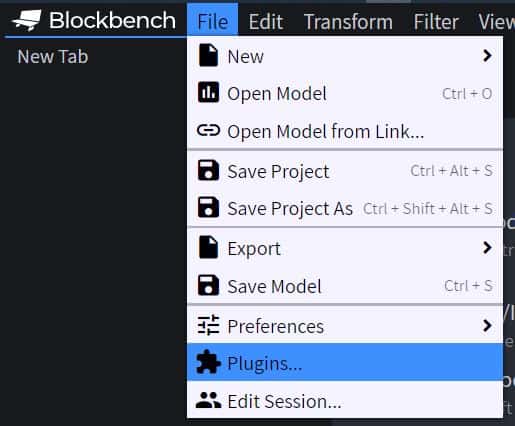
- Click File => Plugins
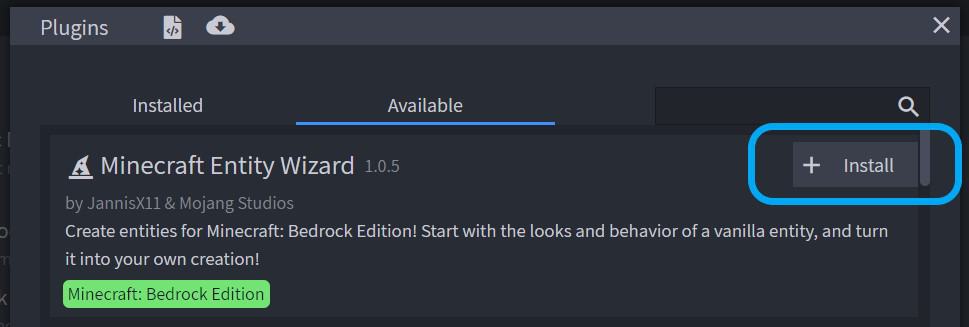
- Find and install the “Minecraft Entity Wizard” plugin
Creating your first Mob
Using the Wizard
- With the “Installing the Minecraft Entity Wizard” plugin and Minecraft Bedrock edition installed open Blockbench
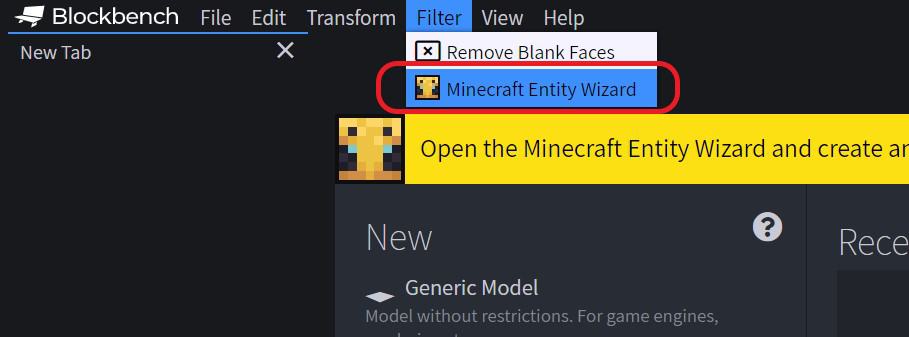
- From the Filter menu click Minecraft Entity Wizard
- Click Let’s Go
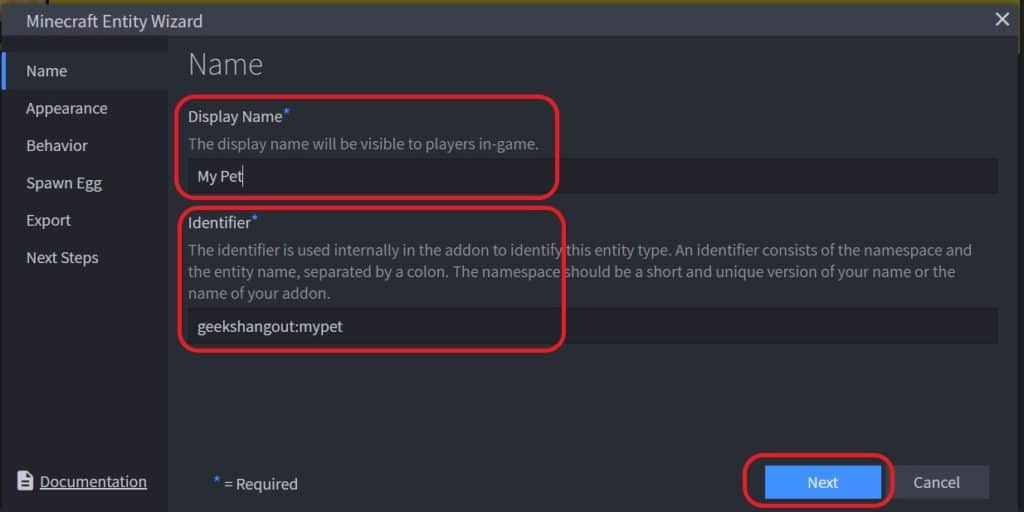
- Give your custom mob a name and an identifer and click Next, for example
- Name: My Pet
- Identifier geekshangout:mypet
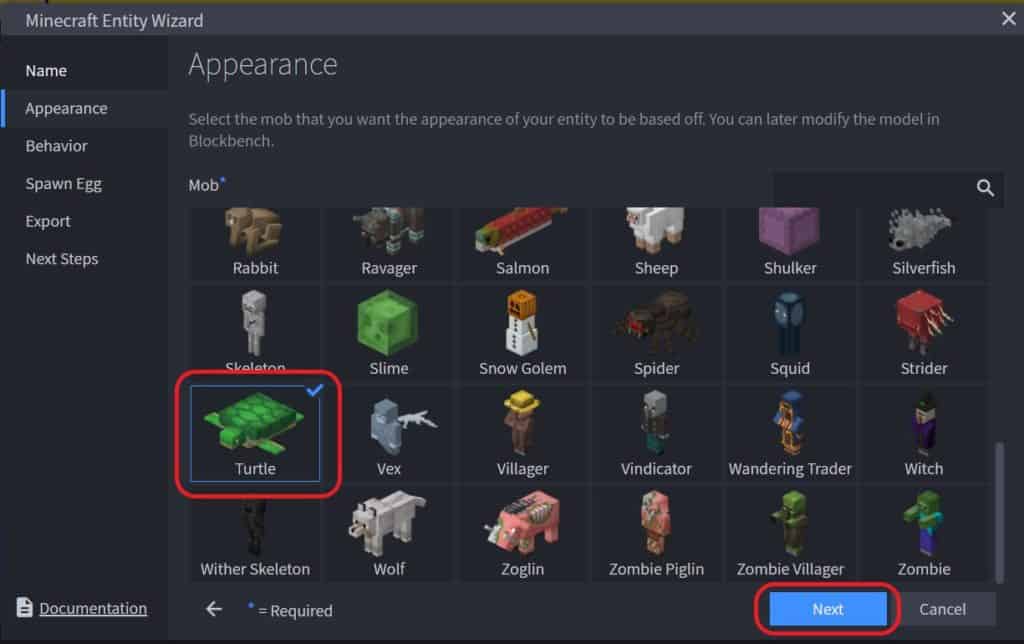
- On the Appearance screen select a mob to get you started and click Next. I am going to choose the turtle.
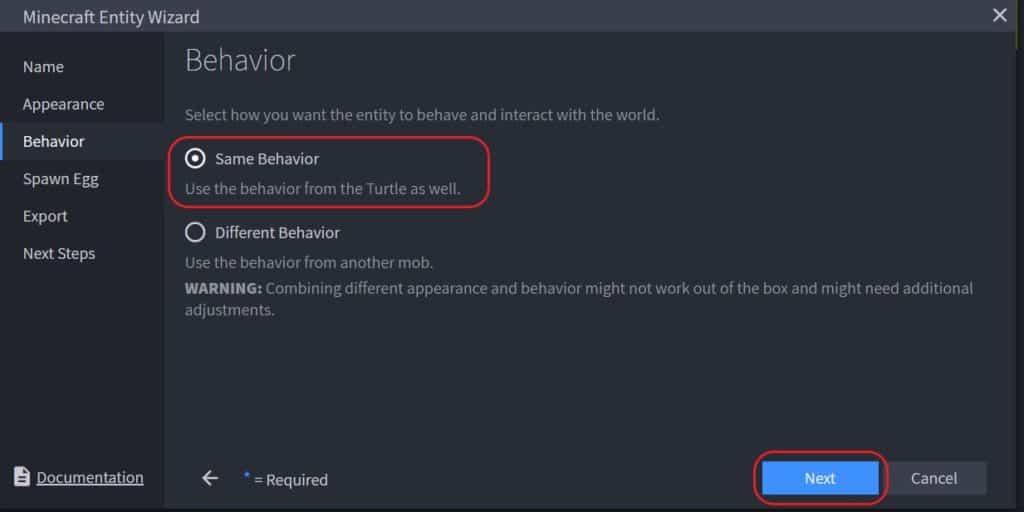
- As we are just getting started leave the behavious as “Same behaviour” and click Next. But note you can give your custom mod a different behaviour
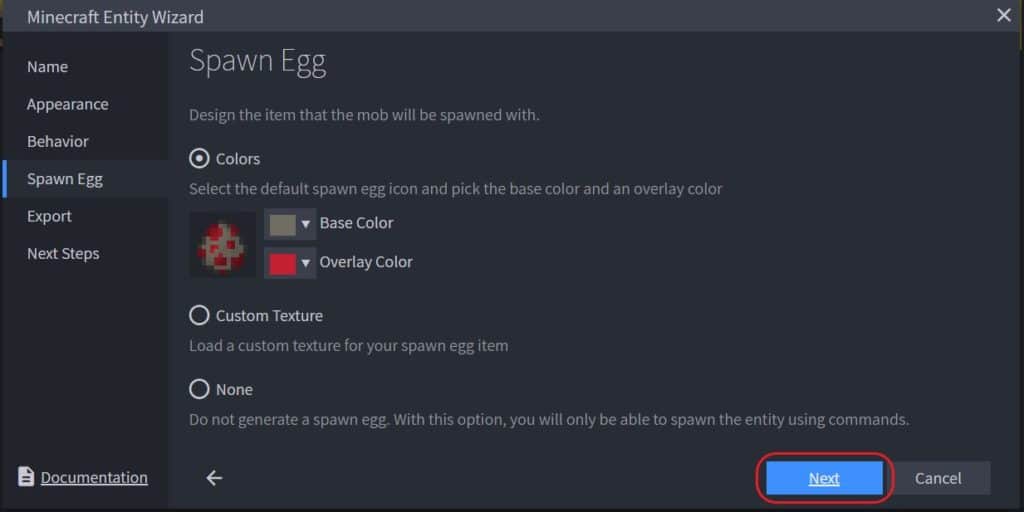
- I am going to leave my Spawn Egg with the default colors, but mae watever changes you like and click Next.
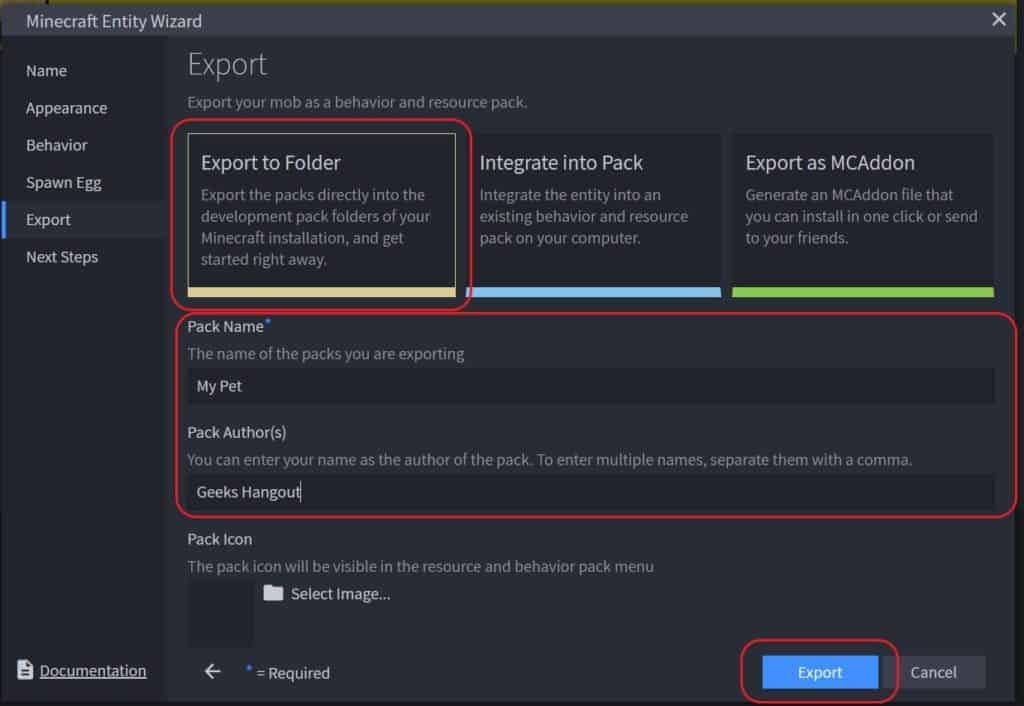
- Choose your export option, give your pack a name and click Export. I am going to choose “Export to folder” as this will export directly into the Mimecraft folder, nice and easy.
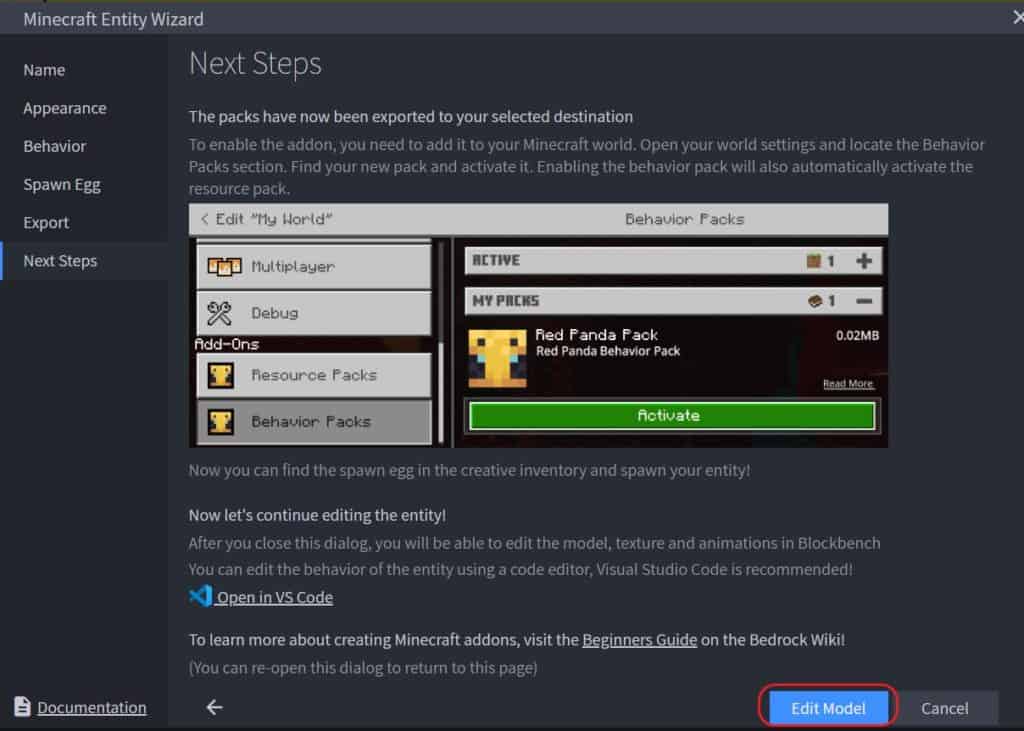
- On the “Next Steps” screen ckick “Edit Model”
Editing the model
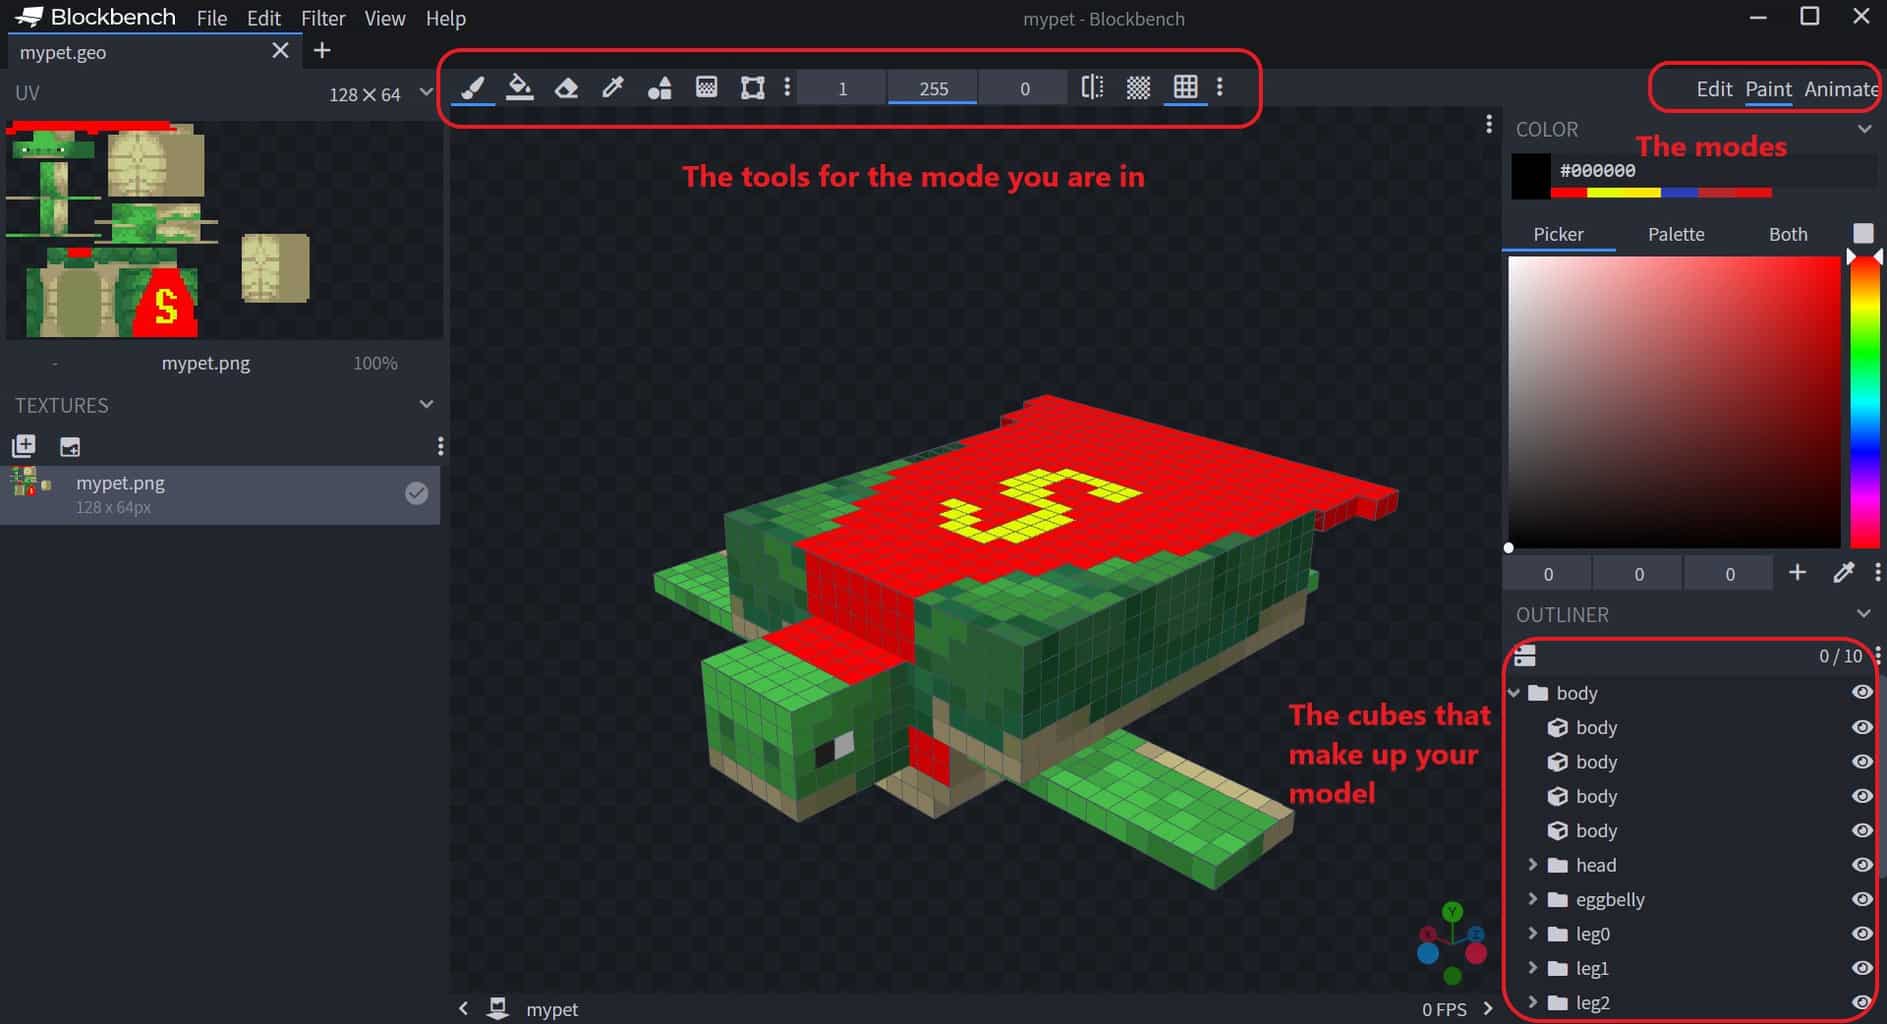
You should now have a 3D turtle or whatever mob you choose during the wizard. yOu can drag to rotate the model around
In the top-right, you have three modes
- Edit – Change and add cubes that make up the structure of your model
- Paint – No more complex than Paint in Windows
- Animate – Change the animations for your model
Depending on the mode you are in you will get a different set of tools at the top i.e when in paint you will get tools like a brush and a bucket fill.
Getting your mob into Mimecraft
- In the Blockbench File menu click Save Model
- Open your copy of Mimecraft (bedrock edition)
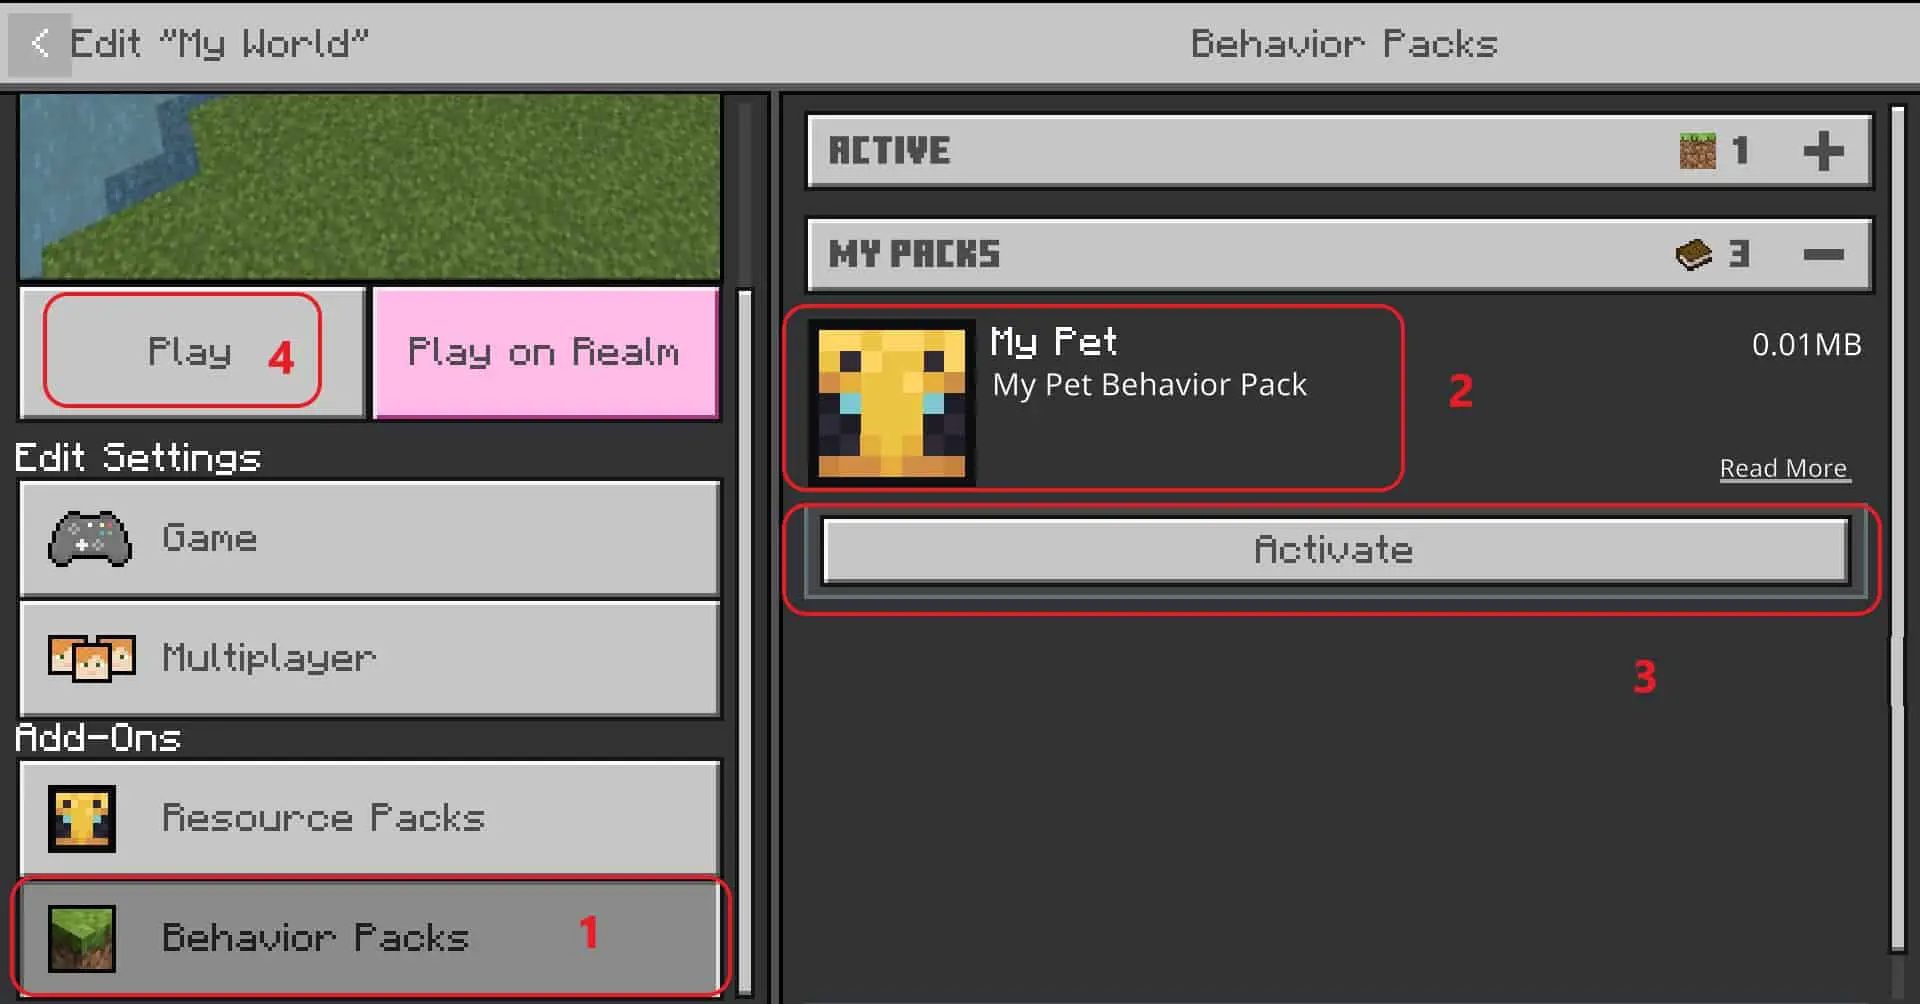
- Click Play and either create a new world or edit an existing
- Under Add-on click Behaviour Packs
- Select your Pack and click Activate
- Click Play to start your world